How to adjust Image brightness to improve the visual effect

What are the key parameters you can think of that affect the effectiveness of an image? Contrast, saturation and brightness. In this article, we will focus on brightness as the topic. We see a lot of pictures every day, and a picture with low brightness and a picture with high brightness will show completely different visual effects.
How to optimize images with low brightness, you may think of an image editor. For example, you can use PhotoShop and the Image Brightness Editor. The Photo Brightness Editor has a simple function to change image brightness; some also offer saturation adjustment. Let's understand the brightness of a picture.Brightness is adjustable by photo editors or image processing software. This allows us to better adapt to the user's preferences or improve the image's visibility.
What is Image Brightness?
Image brightness is the overall brightness or darkness of a picture. It is the amount of light emitted or reflected from the image. In image processing, the image brightness can be achieved by adjusting the intensity of the image pixels. The image brightness affects the overall visual effect and influences the color and the visibility of the individual elements in the image.
When you are in a stunning landscape, the sun sets behind the horizon, casting a warm golden glow over the world. The brightness of the sun's rays brings out the intricate details of the surroundings, creating a captivating and inviting atmosphere.
In image editing, brightness affects the visual appeal of an image. The right brightness level can show colors and details that would be missed. The adjustment of brightness also affects the contrast of the image. When the brightness level is just right, the visual effect of the picture is also the best. It can also better attract the user's attention.
Brightness adjustment is one of the basic operations of image editing. Bring your images to life with brightness. With suitable adjustments, create a masterpiece that will leave a lasting impression on your users.
How to Adjust an Image's Brightness?
Let's see how to adjust the brightness of an image. There are three methods.
Part 1: Adjust Image Brightness in PhotoShop
- Step 1: Hold down "Ctrl+O" to open the picture you need to edit.
- Step 2: Select "Image"> "Adjustment"> "Brightness/Contrast" at the top to adjust the parameters after the pop-up window appears.
- Step 3: Click "File"> "Save" or "Save As" to finish editing.
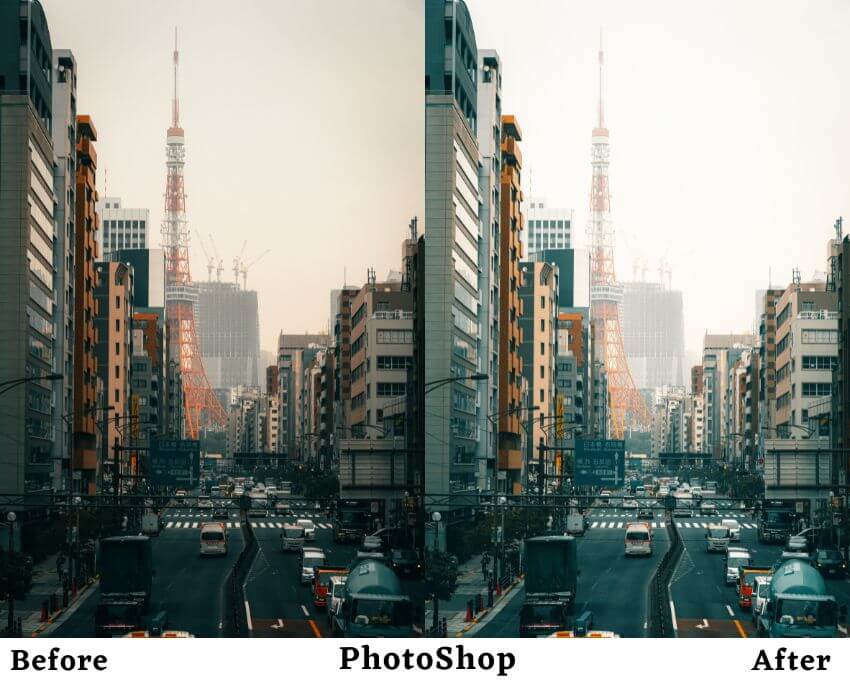
Brightness :80 Contrast:-25
Part 2: Adjust image Brightness with Photo Brightness Editor
- Peko Step
- Step 1: In the bottom left box, select "English" as the language of the page.
- Step 2: Click "Drop your image file here" to drag and drop the image to the specified area.
- Step 3: Adjust the brightness and contrast of the image by dragging the slider. Click "Apply" to adjust the effect again.
- Step 4: Right-click the mouse and select "Save Image As".
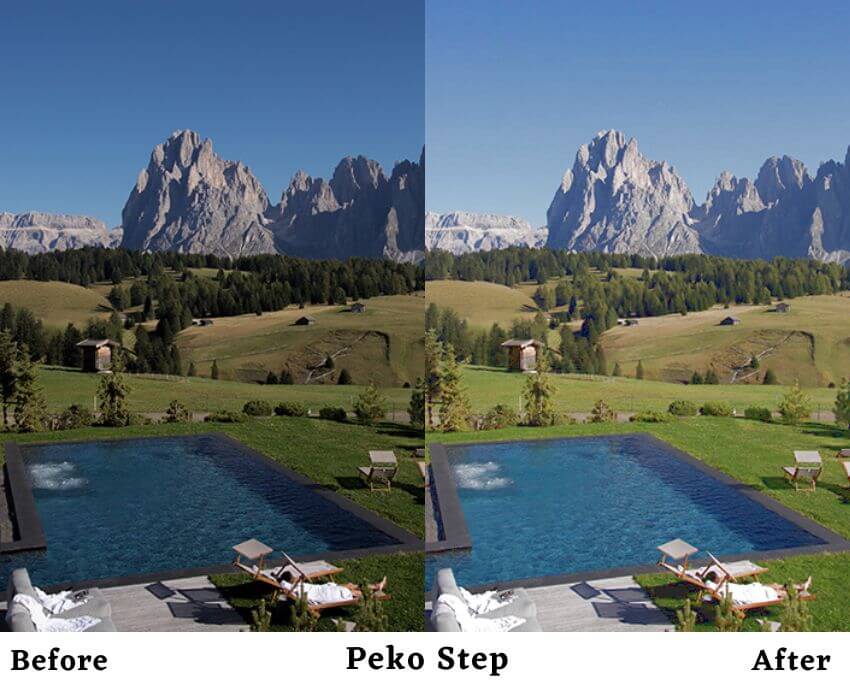
Brightness:15 Contrast:0
- Gifgit
- Step 1: Select "Colors"> "Brightness" in the navigation bar.
- Step 2: After entering the brightness adjustment page, upload an image in the box of Upload a file.
- Step 3: There are a lot of tool icons above the picture that you can use to adjust the brightness by moving the slider left and right. The picture will show the preview effect directly.
- Step 4: Click on the folder icon to save the edit after the adjustment is complete, and click on the arrow icon to download. You can customize the output format to PNG or JPG.
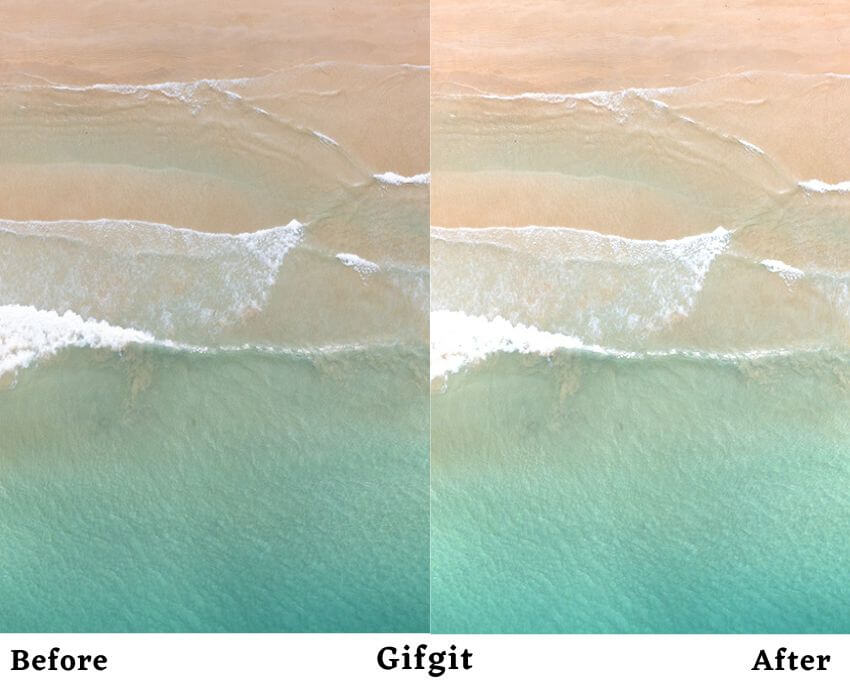
Brightness:110
- Imgonline Tools
- Step 1: Select the black button "Select image" to upload the image.
- Step 2: Slide the slider to adjust the brightness, and click "Apply Changes" to view the effect in the right box. You can adjust the parameters again according to the effect.
- Step 3: After the adjustment, select "Output Format" PNG, JPG and Webp at the bottom of the right box, and click "Download" to download and view.
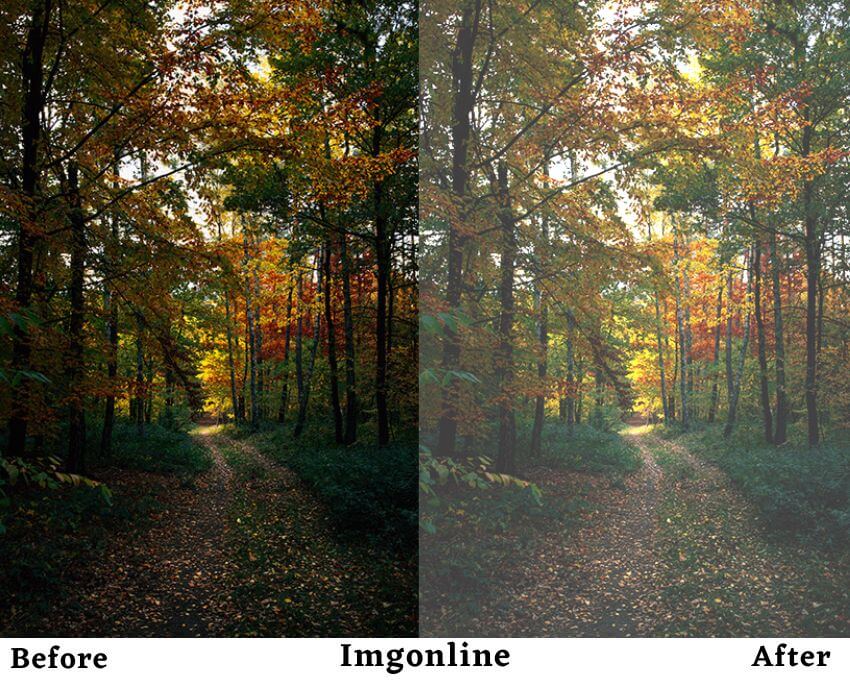
Brightness:15
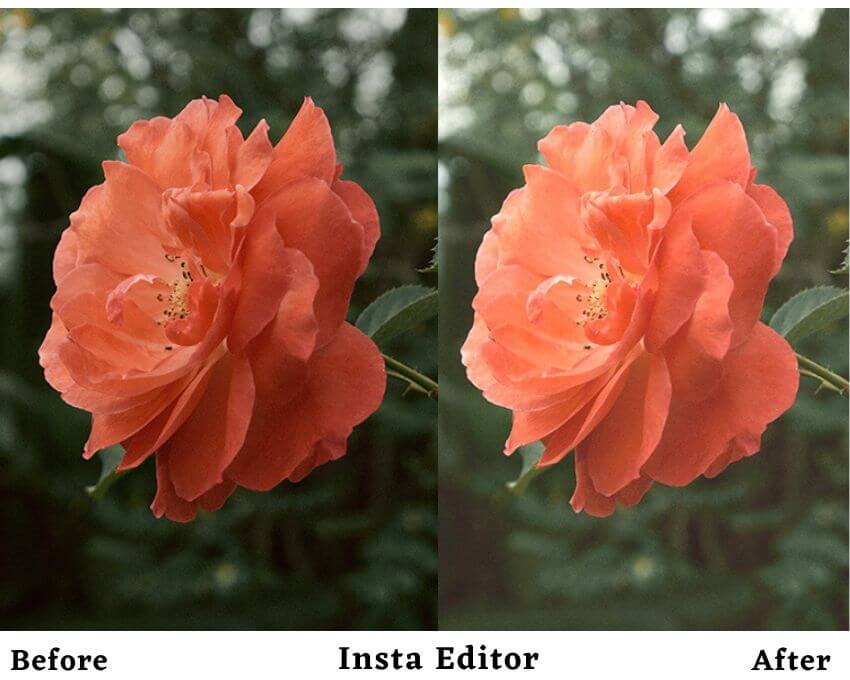
- Insta Editor
- Step 1: Click the arrow to upload a picture.
- Step 2: After the picture is uploaded successfully, adjust "Brightness", "Contrast", and "Saturation".
- Step 3: There are many tool icons above the picture to choose to use. Adjust the brightness on the left and right to move the slider. The picture will show the preview effect directly.
- Step 4: Click the "SAVE" icon above the picture to save it after finishing the adjustment. Support renaming the file and adjusting the image format and quality.
- Tech Lagoon
- Step 1: click the yellow button "Browse" to upload your image.
- Step 2: Adjust the Parameters of Brightness and Contrast.
- Step 3: Select the red button "Convert" to check the effect. You can keep adjusting the parameters to achieve the effect you want.
- Step 4: Finally, click "Download" to save the image.
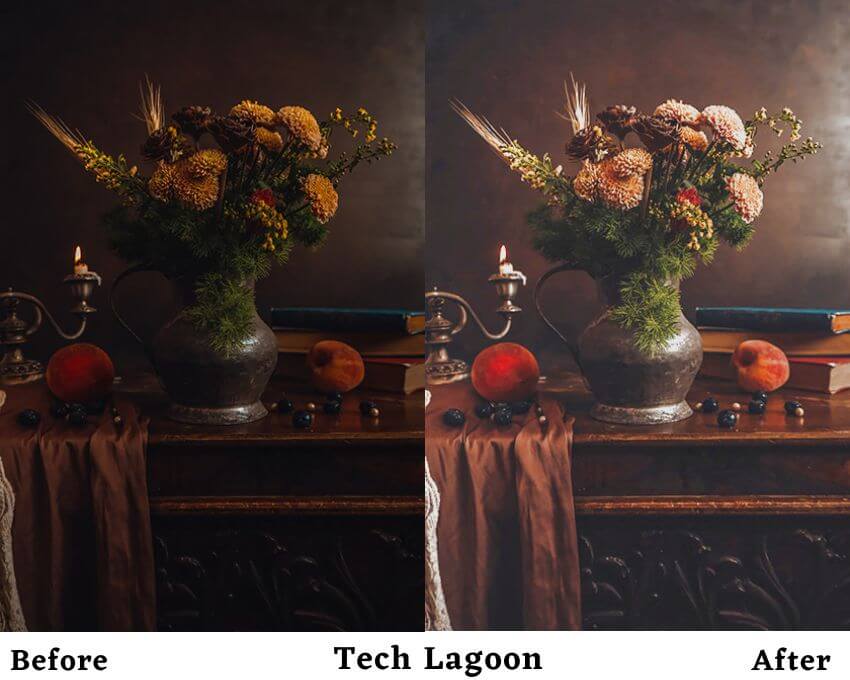
Brightness: 75 Contrast: -15
Part 3: Automatically Optimize The Photo Brightness with AI Tools
Imglarger is a one-stop solution for image editing. It is an image-processing toolkit combined with AI. AI Enhancer is one of his most popular tools, which automatically optimizes images enhance images online through AI algorithms. By analyzing the uploaded images, the brightness, contrast, and color of the images are intelligently adjusted. Optimize the images while producing more natural visual effects. The most efficient thing is that imglarger dramatically simplifies the image editing process by combining AI and eliminating the need to adjust parameters manually. Imglarger gives you automatic processing.
Here are the steps for using ImgLarger's AI Enhancer to optimize the brightness of an image:
- Step 1: Enter the site and click the Navigation bar to choose Enhancer
- Step 2: After successful page jump to click the blue button "Select images" to upload your pictures
- Step 3: After successful uploading, you will see if you need to edit, click on "Edit". And click on "Start" to convert. You can choose between "Normal AI" and "HDR"; two enhanced formats for you.
- Step 4: Please select "Download" to view and save, When enhancing the finish.

Why Brightness is important for image
Brightness plays a vital role in the quality and style of an image. A too-bright or dark photo will not show the picture properly. A too bright or dark picture can damage or dilute essential details and features, making it lose its visual appeal. More seriously, it can lead to the scrapping of the image.
Therefore, it is essential to adjust the image according to its condition and choose the most suitable brightness level. The correct brightness matches and enhances the style and quality of the image, thus presenting a better visual effect. Photos with high brightness give a more lively and vivid overall feeling, while photos with low brightness will add some emotions and a mysterious atmosphere to the pictures. Proper brightness can better show individual objects' details, textures and colors. It can highlight the picture's theme and facilitate people to understand and appreciate it.
Conclusion
See here we know the impact of brightness on the visual presentation of a photo. By adjusting the brightness we can explore more subtle visual effects. We can use the image editor to help us to adjust the brightness. The article also describes how to use them to choose them according to your preferences. If you think more about the overall effect of the picture, AI image editor Imglarger is a good helper. What about adjusting the brightness can improve the image quality? Let's try it now!